
Sensics, the developers supporting the Open Source Virtual Reality (OSVR) project, has recently merged improved IR camera tracking code into their codebase. This patch improves the performance of the IR camera tracking system, which uses IR beacons on the OSVR HDK (the bit that goes on your head) to track the users’ position in 3D space. Position tracking with the OSVR has been a thorny issue for some time, so this is a very welcome update.
The new tracking code works in tandem with some changes to the IR beacons on the OSVR HDK. It looks like Sensics released new firmware for the IR LED driver board. This firmware disables some of the redundant LEDs on the HDK, which prevents the IR beacons from blurring together into one pulsating mass at a distance.
Unfortunately, while the HDK and IR camera firmware can both be upgraded over USB, the IR board in the HDK seems to be physically disconnected from the main board, which means the only way to upgrade the firmware is to directly connect a ST-Link/V2 USB programmer to the board.
Some of the early HDKs do not have a connector on the IR Board for the ST-Link/V2. If you have one of these HDKs, you can follow this user’s excellent guide to soldering the proper connector to the IR board. My HDK v1.3 turns out to have the proper header, which is a tiny 4-pin ERNI connector. Here’s the process I used to upgrade the firmware.
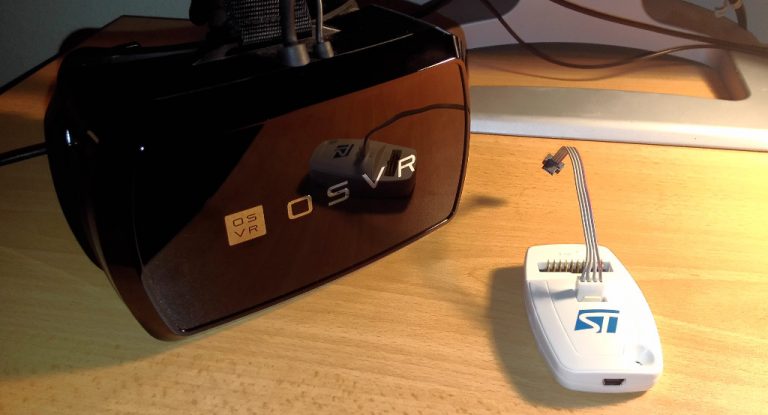
OSVR HDK v1.3 next to ST-Link/V2 USB programmer
1. Get the ST-Link/V2 USB programmer. I ordered mine from Digi-Key. There are two variants: the “hockey puck” version, which comes with the correct 4-pin cable for the “P5” header built onto later editions of the HDK, and the $10 version on the OSVR store, which as far as I know does not come with a cable. If you’re soldering your own connector, you’re braver than I am, and you also can probably use the cheaper programmer on the OSVR store because you can make your own cable.
2. Download and install the ST-Link drivers from the ST-Link website. They’re free, but you have to give them your email.
3. Download the latest IR Board Programmer Bundle (.exe) from GitHub.
4. Unscrew the two tiny Phillips screws on the bottom of the HDK.

The two screws on the bottom of the HDK, as well as the itty bitty screwdriver you’ll need to open it.
5. If you don’t have the P5 header on your IR board, this is where you’ll need to start soldering. If you do, you can go to the next step. The header is circled.
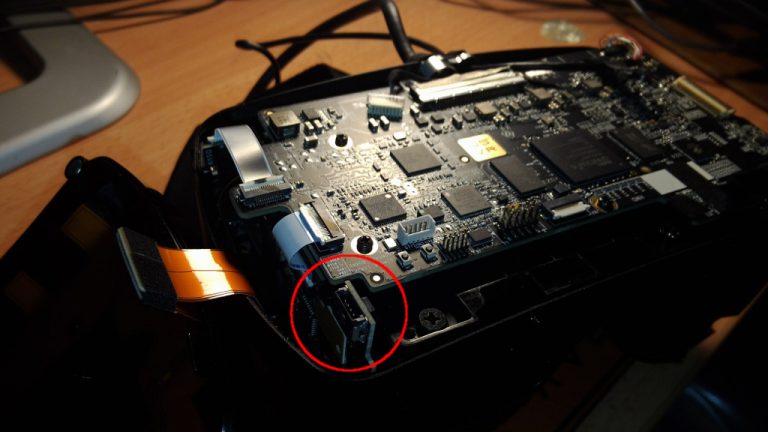
P5 header, a 4-pin ERNI connector.
6. Hook up the programmer, first to the IR board, then to the computer. Use the 4-pin SWIM to ERNI cable connected to the STM8 plug on the programmer (if you’re using a premade cable).
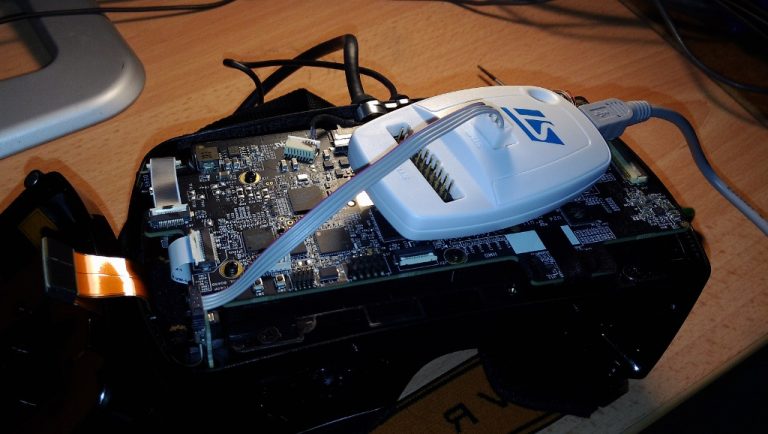
Programmer attached. Used the 4-pin SWIM->ERNI cable.
7. Hook up the HDK to the computer via USB. I also plugged in my power brick for the HDK. This may not be necessary and may potentially also damage the HDK in some unforeseen circumstances, so be careful. The ST-Link/V2 on its own does not seem to have enough juice to power the IR board on its own for programming, hence this step.
8. Run the firmware bundle .exe. It’s a self-extracting archive. Extract to a folder.
9. Start a command prompt with elevated privileges and run Program-IRFirmware.cmd. If you didn’t hook up the power to the HDK, you’ll see “Tries Exceeded” as the ST-Link/V2 tries and fails to power the USB board. Otherwise you’ll see the message in green below.
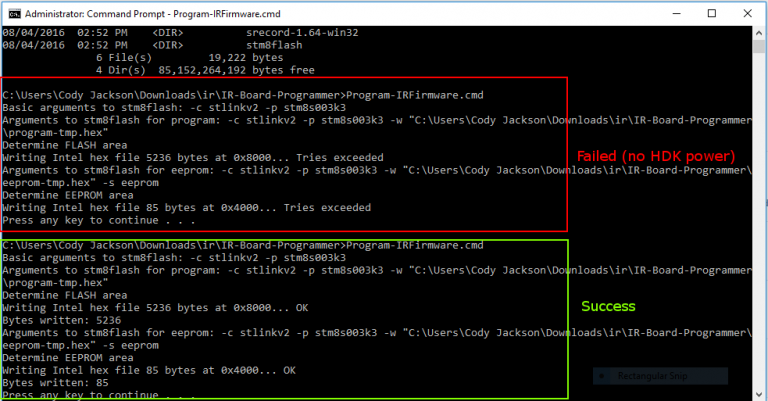
You should see the message in green.
At this point, disconnect the power/USB from the HDK, disconnect the ST-Link/V2, and reassemble the HDK. Now when you power on the HDK, you should see an asymmetrical pattern in the LEDs. You’re done!
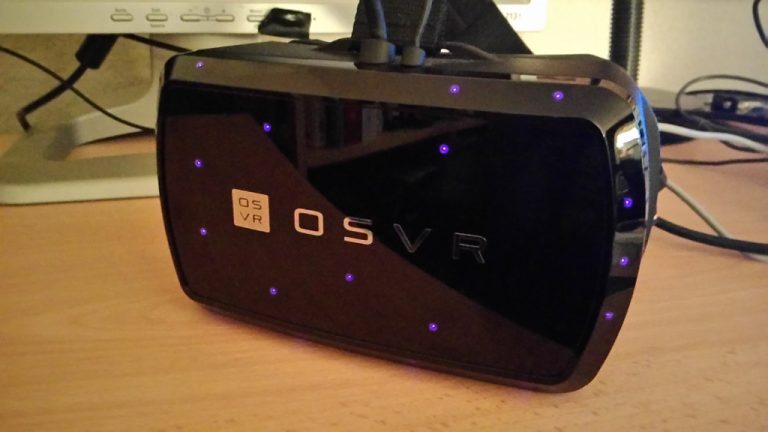
Done!
After installing the IR Board firmware, I also installed the OSVR Performance Upgrade for HDK v1.3/1.4. I don’t know what this does exactly, but the OSVR docs say to do it, so I did it. Annoyingly, you have to provide an address to check out anything from the OSVR store, but at least it’s free.
In Part 2, I’ll describe how to set up the OSVR server configuration file to use the new IR tracking plugin.


